How to Photograph Gems & Jewelry
September 30, 2015
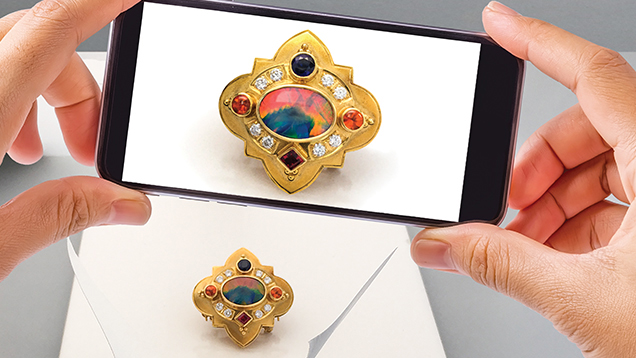
Being able to take great photos of gems and jewelry is a valuable skill – whether you’re in retail sales, gem identification, wholesale, design, or do it for a hobby. And it will only become more important as social media and e-commerce play an increasingly central role in our lives.
A state-of-the-art digital SLR or mirrorless camera is usually best for the task. But a smartphone or other similar handheld device with a high resolution camera (8+ megapixels) can take professional-looking pictures using the right techniques and accessories. We offer some tips, no matter the camera you are using, plus some smartphone-specific advice.
Before You Begin
- Use a tripod to stabilize your camera. If one is not available, make sure your smartphone is on a stable surface when taking photos. Make sure your object is in focus. A tap on the screen should do this for many smartphones.
- Use a wireless shutter release to take the photo without touching the screen. Physically touching your mobile device screen could shake it and result in a blurry picture. These devices connect through a Bluetooth connection.
- Clean your jewelry: Your smartphone’s high-resolution camera will capture dust, marks and scratches. Fingerprints, which are often unseen by the naked eye, can also mar beautiful jewelry. A soft, clean jewelry cloth is ideal for getting your pieces camera-ready. Handle the object with clean cotton gloves.
- Depending on your subject, you may benefit from a macro lens that enables extreme close-up photography of small items or minute features. Clip-on macro lenses are available for smartphones from a variety of manufacturers for Apple and Android devices. ōlloclip macro is a good one and is portable.
Amazon.com and Photojojo.com are great resources for smartphone camera gadgets and lenses.
Choose appropriate backgrounds, as it can affect the appearance of metals, diamonds and light-colored gemstones.
- When to use a black background: Light-toned pieces often look better on darker backgrounds because contrast adds drama. It also calls attention to jewelry.
- When to use a white background: Poorly cut gems can appear more attractive on light backgrounds. White backgrounds also bounce light back at the subject matter, which can minimize distracting shadows.
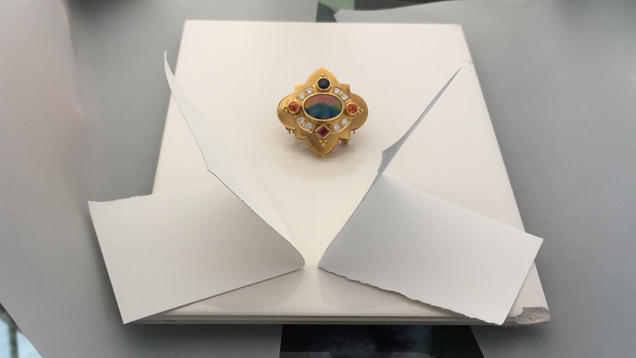
- A clean white piece of paper, plastic or tile used as a background can keep the picture uncluttered and help achieve a correct color balance.
Correct lighting and positioning of a gem or piece of jewelry are two techniques that will help you take great digital photos. The first ensures a successful photograph. The second makes a picture interesting – or even compelling.
Lighting
- Use a single color temperature of light: Try to avoid environments that have mixed lighting – like fluorescent, incandescent and daylight. Find a location that has one kind of lighting, and use it as your only source.
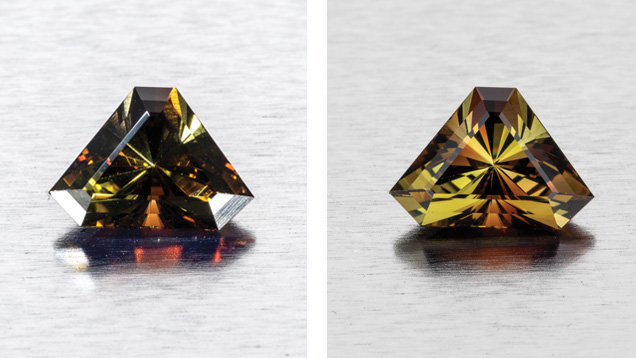
- Direct lighting works best for ornamental materials, and occasionally to provoke dispersion in a transparent gem. It is also sometimes used to bring out gemstone phenomena such as asterism (a star effect) or chatoyancy (a cat’s eye effect).
- To exhibit a gemstone’s best color, lighting should be diffused rather than direct. Diffused lighting scatters light, softens shadows and provides uniform lighting. This can be achieved by placing a translucent white glass, plastic, or cloth between the light source and the gem. Tracing paper, onionskin paper or translucent vellum are also good choices to scatter light, cast soft shadows, and bring out a gemstone’s best color.
- A mix of direct and diffused lighting can add drama to a photograph by adding some sparkle or dispersion to a transparent gem, while also bringing out its finest colors.
- When photographing highly polished metal, the shiny surfaces can be challenging, especially with direct lighting. Diffused lighting often works well to exhibit soft tonal gradients in the metals, and to highlight the designed metalwork.
Positioning
- Gemstones are cut and fashioned to show their best colors when looking straight down at them, perpendicular to the table of the gem. If the gems are cut as cabochons (a gem with a rounded, unfaceted, polished surface) and have asterism (a six-rayed star created when light hits inclusions in the gemstone), it is best to light them in a way that centers the star in the middle of the stone. With carved materials, there is much more latitude in the direction in which a piece can be photographed, but even then it is important to determine the artist’s principal objective. Talking to the cutter or designer is important to have an idea of their perspective.
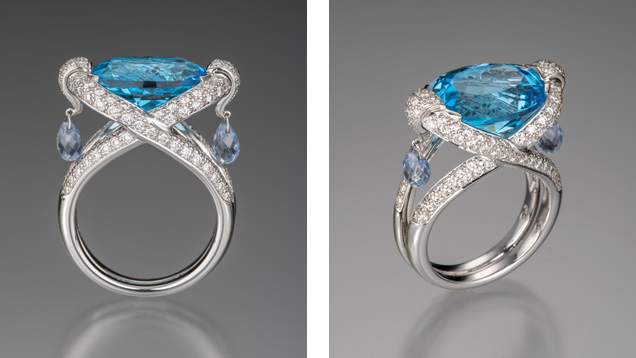
- When positioning jewelry, it is important to consider the jewel’s salient characteristics: is a diamond or a colored gemstone the centerpiece? Can you observe the designer’s intentions through the way you position the jewel, and the camera relative to it?
- The camera angle may also be used as a tool: photographing “straight on” is important for documentary style photographs. To captivate a viewer’s imagination, the subject may be turned, or the camera angle skewed, to obtain dramatic results.
Process Your Image
Do this before you finish your photo shoot. Apps on your phone can crop, help adjust color balance, and get a gemstone or piece of jewelry to photograph the way it really looks. This will avoid colorcasts (unwanted tints in the image), and will help capture an accurate image of the object.
Recommended Apps with advanced photo processing features:
- Camera+: Great for sharpening photos over the regular edit tool
- Instafit: To retro-fit photos with white borders for a more artsy look
- PicTapGo: For easy editing and color correction
- 645 Pro Mk III: Provides a little more control over ISO, WB, filters, etc.
- Retouch: To delete any distracting elements
- iWatermark: To watermark all your images
Taking great pictures is like learning any skill: the more you do it, the better you’ll get. So the next time you set up for a photo shoot, use our tips. The results will be worth it.
